 The middle of July is just about the time when you begin hearing “I’m bored”.
If you are looking for new things to do to keep the kids occupied during these final weeks of summer vacation, we have three kid-friendly art projects using recycled materials. Not only will you be busting the boredom blues, but you will be teaching your kids the importance of recycling and making something beautiful for your home (no macaroni frames here!).
Mosaic
A mosaic is a piece of art that is created from small pieces of materials and assembling them together to create a new masterpiece. The material that can be used can be anything you have around the house. Buttons, bottle caps, broken tiles, or broken mirrors can all be used to make pretty mosaics.
You’ll want to get a piece of wood for the base of your mosaic. Spread the grout down onto the wood and arrange the mosaic pieces to form a design. Cover the entire mosaic with grout to fill in the spaces between the pieces. Use a damp sponge to wipe the grout off the mosaic pieces. Let the mosaic dry until it hardens. Hang your new artwork on the wall and admire your work!
Decorate a Box
This art project serves two purposes – it’s pretty and functional! Find an empty cereal box or a laundry detergent box to decorate. Cut a hole into one side of the box. The size of the hole will depend on what you’re going to use your new organizer for – will you use it to hold the mail, magazines or your office papers? Now find some old wallpaper, wrapping paper or paper grocery bags (which you can then decorate yourself) to cover the box. In order for the paper to stay adhered to the box, use heavy-duty glue.
If you’d like to embellish your box even further, use hot glue to add old buttons, ribbons or toys to the box for decoration. Now you have the perfect organizer that is not an eye sore. Another bonus? Since your kids helped make it, they will be more likely to actually use it.
Festive Permanent Corner Garland
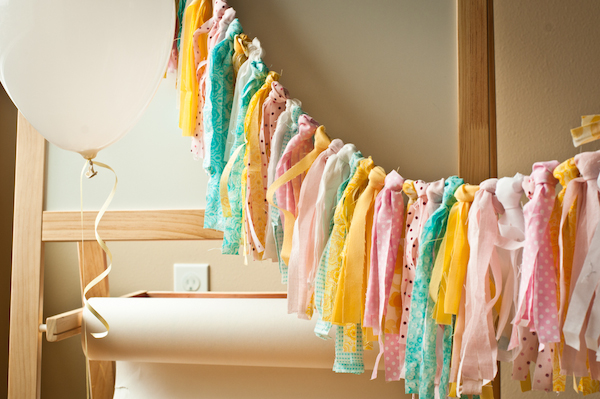
Who says you can’t liven up a corner of your house with garland even if you’re not having a party? For this simple art project idea from Clever Thursday all you need is scrap fabric, long ribbon or lace, scissors and a ruler.
Measure a length of ribbon and tie loops at each end for hanging. Next, cut your fabric into 3” strips of varying lengths (we like everything from 14” to 18”). Fold your fabric strips in half and make your “fringe” by cutting from the bottom (where the fabric is open) and stopping an inch or two from the top (where the fabric is folded).
Place the fabric behind the ribbon you cut earlier. Make a loop with the top of your fabric strip and pull the two fringe sides through it keeping your ribbon in the middle. Repeat until you have a long garland. Use adhesive putty, double sided tape or thumb tacks to hang.
This garland looks great hanging in the corner of a playroom or across the headboard in your child’s room.
With a little imagination, and a few supplies you most likely already have on hand, you can create a beautiful masterpiece to display in your home for years. Bring your kids together for a craft day this summer and create a new memory!
