Halloween is fast approaching! If you haven’t carved your pumpkin yet, we’ve got some fun, creative ideas for you!

Drill Holes! Get out the power tools and literally drill holes into a pumpkin for a quick and easy design. Use just one size for a uniform look use multiple sizes for a fun and more whimsical look.
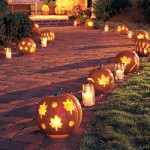
Cookie Cutter Pumpkin – if you have little kids that are not quite knife ready, let them pick out some cookie cutter shapes and have them place where they want the shape on the pumpkin and use a mallet to cut them out.
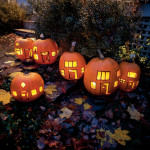
Village of Pumpkins – use several pumpkins to paint one black house onto the front of each pumpkins, then simple cut out only the windows of the houses. You now have your own little village!
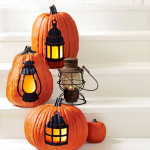
Lantern Pumpkin – just like the village, with black paint, paint an image of a lantern on the pumpkin and cut out only the “glass” portion of the lantern (the part that would glow from the light). You have given a whole new meaning to the word Jack-O-Lantern.
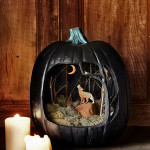
Diorama – just cut a big hole out in the front of the pumpkin, and clean the inside of the pumpkin out. Then create a diorama inside – any scene you would like!
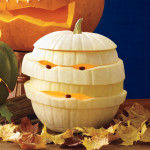
Mummy Pumpkin – Hollow out a white pumpkin and slice it horizontally. Place the pieces back together, slightly skewed, holding them together with toothpicks. Glue on some coffee beans or brown M&Ms for the eyes and mouth.
Or forget the cutting all together and just decorate with paint and other accessories:
- Glow in the Dark Pumpkins – use glow in the dark paint to create any design you’d like. Once the sun goes down your design will shine!
- Frozen – Light blue paint, glitter, snowflake stickers and a crown on top and you’ve got yourself a Frozen themed pumpkin!
- Chalk – paint your pumpkin with chalkboard paint and decorate your pumpkin with chalk. Your design could change every day – just wash off the chalk and start again with a new design tomorrow!
- Painted Pattern – use painters tape to create a design on your pumpkin (stripes, zig zags, or just to divide the pumpkin in half) then use a foam brush to paint two coats of acrylic paint onto the pumpkin. Wait at least 30 minutes between coats and after the second coat before you remove the paint. If you don’t want the natural pumpkin color to be your second color, use a small paint brush to fill in with paint after you remove the tape.
No matter what you do with your pumpkins this year be sure to have fun and get creative! Happy Halloween!
Talk to us: Send us a picture of your pumpkin creation!
